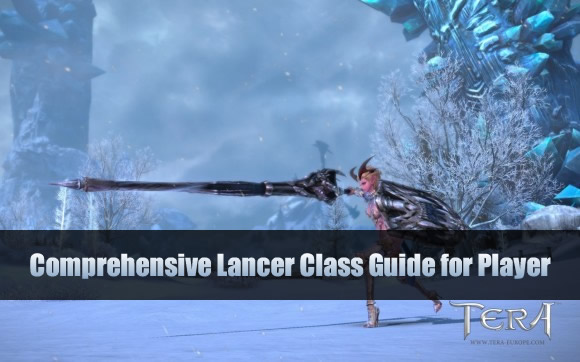
As powerful in defense as in attack, the lancer’s role in a fight is at the head of the formation. His heavy shield absorbs damage, while his lance provides striking power that’s targeted yet effective against multiple foes. Numerous skills for drawing aggro let the lancer take the heat and give his party members more opportunities. Lancers can minimize damage to their own party and help them devastate the enemy. Don’t forget to from U4GM.com to buy cheap tera gold, which is the best choice for tera gold services on the market!
Lancer is the classic tank of TERA’s trinity system. Lancer has few skills to manage but they have a lot of things to consider in combat as a tank and support: positioning, aggro, buff usage, debuff uptime, damage blocking, and damage dealing. Even though Lancer deals less personal DPS, its support skills significantly increase the party’s overall DPS. A downside to Lancer is that it is one of the most ping-reliant classes. It can be difficult to chain their skills correctly without low ping.
PVE: S-Tier
Lancer is the meta preferred tank class, with its strong party support skills, and since tanks aren’t very common, Lancers are highly desired in most dungeon parties.
Solo Play: C-Tier
Lancer would only be considered C-tier for Island of Dawn farming (solo play) because of their low personal damage and damage loss from the knockdown.
Survivability: Lancer’s backstep is limited by its resolve, but to make up for it, Lancer has high base defense and several ways to reduce damage and self-heal, in addition to their block. Played right, they can live indefinitely.
Race Preference:
- Elin: Has more mobility than other classes. Longest reach on the first hit of Combo Attack and Shield Barrage.
- High Elf Male: Faster Shield Barrage animations.
Weapon:
- Top: Increased damage by 9.3% when attacking enraged monsters.
Increases Attack speed by 9% - Bottom: Increased damage by 9.3% when attacking enraged monsters.
- Increases damage by 8.6% to the target with the most aggro towards you.
- Increases damage by 6%
- Decreases Skill Cooldowns by 7.2%
Armor
- Top: Increases damage of Spring Attack by 15%. – Spring attack ends up at roughly 30-40% of our overall damage, significantly more impactful than any of the other bonuses given by armor rolls.
- Bottom: Decreases damage by 8.7% from the monster with the most aggro towards you.
- Decreases damage taken by 6%.
- Decreases damage taken from frontal attacks by 6.9%.
- Decreases damage from enraged monsters by 10%.
Gloves
- Increases Power by 5.
- Increases Attack speed by 2.25%.
- Increase Crit Factor by 9.
Boots
- Increases Endurance by 4.
- Increases Movement Speed by 6%.
- Replenishes 2% of total MP every 5 seconds.
Tips&Tricks
Onslaught
Onslaught has a fairly unique trait – most damage taken while casting Onslaught is halved. This is quite useful in SSHM as many of the “one-shot” mechanics don’t deal fixed damage. This lets us deal damage when otherwise we’d have to avoid certain AoE’s to not die. The recording of Nightmare Dakuryon posted later on in this guide shows a good example of this.
Skating
This is a ‘feature’ exclusive to those who are either Elin or High Elf Male. Basically you “skate” across the floor by using Combo Attack and quickly canceling it with a block. It’s slightly faster than simply walking while in combat, and it may also net you a little bit of damage. The majority of your movement will be via Charging Lunge and Shield Barrage, so I personally use this mostly for micro-movements. Here’s a video of me demonstrating it.
Barrage Cancel
Of all these tricks, this one may be the most significant. Barrage Cancel is done by putting a micro block in between the two hits of Shield Barrage, in order to completely remove the first swipe animation. To do this, you “simply” have to shield barrage hit #1 > tap block > shield barrage hit #2. This saves a lot of time in long fights. It also makes attack speed a bit less important, because much of our time is invested into casting Shield Barrage. The timing is very tricky though, and it’s very difficult to master. Here’s a video of me demonstrating it.
The beginning of the video shows examples of Barrage Cancelling, and the end shows normal Shield Barrage for comparison.
Tap Blocking
When blocking, you can only get one stack of Hold the Line per block instance. So when bosses use multi-hitting attacks, if you tap your block, you can get more than one stack per attack. Be careful though, for if you mistime it you will take unwanted damage. Here’s a video of me demonstrating it.
Front-Critting from the Back
There are three-hit areas to each monster: the front, sides, and back. As a lancer, we almost always use the Wrathful Crystal, which increases our critical power when attacking from the front. The Wrathful Crystal counts side crits as front crits. There are ways to manipulate your camera so that all of your
Double Brooch
It is useful to have a second brooch, as you can get the active effect from both in one fight, resulting in a slight DPS increase. To get the active effects of two brooches in one fight, you equip your secondary brooch, use the active, then swap to a costume set with your main brooch before you enter combat. You cannot have two different brooch effects on you at once. Note that Empowered and Quatrefoil Brooch share cooldowns, so you cannot use those two in combination. Here’s a video of me demonstrating it. https://www.u4gm.com/tera-gold